Grabbing a web page screenshot is simple enough. But doing it hundreds of times? That's a surefire way to lose your mind. This is where automation steps in, turning a soul-crushing manual chore into a slick, integrated workflow. You get speed, accuracy, and scalability for any project that needs visual proof.
Why Automate Web Page Screenshots

Let's be real—browser extensions and built-in OS tools are fine for the occasional one-off capture. But when you need to grab dozens of screenshots for a client, monitor a site's visual changes daily, or generate social media previews on the fly, manual methods just don't cut it. They're slow, prone to human error, and impossible to plug into your actual applications.
An API-driven approach is the only sane way to capture web content at scale. It gives you programmatic control over every detail—from viewport size to output format—guaranteeing every image is consistent and high-fidelity. For devs, QA teams, and marketers who depend on accurate visual data, this isn't a luxury; it's a must.
The Limits of Manual Tools
For any serious workflow, manual screenshot tools are a dead end. They buckle under the pressure of modern, dynamic websites loaded with lazy-loaded images, animations, or those annoying cookie banners that need dismissing. Trying to get a consistent full-page capture across different machines and screen resolutions is a complete nightmare.
This inconsistency causes real problems for critical tasks:
- Visual Regression Testing: You need pixel-perfect captures to reliably spot unintended UI changes after a new deploy. No exceptions.
- Content Archiving: For legal compliance or historical records, you have to capture the entire page exactly as it appeared at a specific moment.
- Generating Marketing Assets: Social media previews, like Open Graph images, need to be sharp, correctly sized, and generated automatically as your content changes.
Relying on manual screenshots for these jobs is like using a sticky note for your production database—it's unreliable, doesn't scale, and injects unnecessary risk right into your workflow.
The Rise of Automated Capture
The need for solid screenshot automation isn't just a niche developer problem anymore. The global website screenshot software market was valued at $1.4 billion in 2024 and is projected to hit $4.5 billion by 2033. This boom shows just how vital digital documentation and visual testing have become. As e-commerce and digital marketing keep growing, teams need better tools to capture, analyze, and share web content without burning hours. You can learn more about the trends driving the website screenshot software market in this report.
Let's quickly break down the difference between the old way and the new way.
Manual Screenshots vs Automated API Capture
| Feature | Manual Browser Tools | Automated Capture API |
|---|---|---|
| Speed | Slow; one capture at a time | Fast; thousands of captures in parallel |
| Consistency | Highly variable; depends on user, OS, screen | Pixel-perfect; consistent every time |
| Scalability | Not scalable at all | Scales to millions of captures |
| Integration | None; requires manual upload/sharing | Fully integrates into any application or CI/CD pipeline |
| Customization | Basic options (e.g., window, selection) | Granular control (viewport, full-page, element selectors, format) |
| Use Cases | Quick, one-off captures for personal use | Visual testing, archiving, social previews, monitoring |
The table makes it pretty clear. While manual tools have their place, pro-level tasks demand an automated solution.
Automating with an API like Capture solves all these challenges. It lets you build rock-solid workflows that run on their own schedule. You can set up jobs to archive sites overnight, trigger captures after a code deployment to hunt for visual bugs, or generate thousands of unique social sharing images in minutes. It's about turning a repetitive chore into a real strategic advantage.
Your First API Call in 5 Minutes
Alright, enough talk. Let's get our hands dirty. The goal here is to get you from zero to your first generated web page screenshot in under 5 minutes. No fluff, just the essentials.
We have official SDKs for Node.js, Go, and Rust, so you can skip the pain of raw HTTP requests and plug this into your project cleanly. Pick your stack and let's go.
The process is dead simple: install the SDK, plug in your API key, tell it what URL to capture, and save the image. That's it.
Setting Up the Node.js SDK
If you're in the JavaScript world, getting started is as easy as installing the official npm package. Pop open your terminal and run:
npm install capture-node
With the package installed, create a client instance using the API key from your Capture dashboard.
Here's a minimal script to grab a screenshot of example.com and save it locally as screenshot.png.
import { Capture } from 'capture-node';
import { writeFile } from 'fs/promises';

const capture = new Capture('YOUR_API_KEY_HERE', 'YOUR_API_SECRET_HERE');

async function takeScreenshot() {
  try {
    const buffer = await capture.fetchImage('https://example.com');
    await writeFile('screenshot.png', buffer);
    console.log('Screenshot saved to screenshot.png');
  } catch (error) {
    console.error('Error taking screenshot:', error);
  }
}

takeScreenshot();
Just swap "YOUR_API_KEY_HERE" with your actual key and run the script (node your-script-name.js). You'll find a fresh PNG in your project folder. Done. That’s your first automated screenshot.
For developers looking to integrate these capabilities, a dedicated Screenshot API like this one streamlines the entire process, especially with helpful SDKs.
Quickstart with Go
For all the Gophers out there, the process is just as smooth. First, pull the Capture Go module into your project.
go get github.com/techulus/capture-go
The logic is nearly identical to the Node.js version. You initialize a client, make the FetchImage call, and write the image data to a file. The SDK handles all the underlying API communication.
Here’s what it looks like in Go:
package main

import (
	"fmt"
	"os"
	"github.com/techulus/capture-go"
)

func main() {
	c := capture.New("YOUR_API_KEY_HERE", "YOUR_API_SECRET_HERE")

	screenshot, err := c.FetchImage("https://example.com", capture.RequestOptions{})
	if err != nil {
		fmt.Printf("Error capturing screenshot: %v\n", err)
		return
	}

	err = os.WriteFile("screenshot.png", screenshot, 0644)
	if err != nil {
		fmt.Printf("Error saving file: %v\n", err)
		return
	}

	fmt.Println("Screenshot saved to screenshot.png")
}
Run that, and you get the same result: a screenshot.png file appears on your disk. The pattern is designed to feel familiar no matter which language you're using. For a deeper look at all the options and methods, you can always check out the official Capture API documentation.
Getting Started in Rust
Rust developers, you're covered too. We have an official crate that provides a safe, idiomatic way to work with the Capture API. Just add it to your Cargo.toml.
[dependencies]
capture-rust = "0.1.0"
tokio = { version = "1", features = ["full"] }
The Rust example uses async/await and follows the same straightforward pattern: create a client, call the fetch_image method, and write the resulting bytes to a file.
use capture_rust::Capture;
use std::env;
use std::fs;

#[tokio::main]
async fn main() -> Result<(), Box<dyn std::error::Error>> {
    let api_key = env::var("CAPTURE_API_KEY").expect("CAPTURE_API_KEY must be set");
    let api_secret = env::var("CAPTURE_API_SECRET").expect("CAPTURE_API_SECRET must be set");
    let capture = Capture::new(api_key, api_secret);

    let screenshot = capture.fetch_image("https://example.com", None).await?;
    fs::write("screenshot.png", screenshot)?;

    println!("Screenshot saved to screenshot.png");
    Ok(())
}
Quick Tip: You'll notice some basic error handling in these examples. This is important. If an API request fails (e.g., bad API key, dead URL), the API returns a non-200 status code and the SDK throws an error. Always wrap your calls in a
try/catchblock or handle theerrresult to build more resilient applications.
Advanced Screenshot Customization
Getting a basic snapshot is the easy part. The real power comes from dialing in the exact parameters to get the precise visual you need. Moving beyond the defaults unlocks a ton of flexibility, letting you control everything from the file format to which specific part of the page gets captured.
This is where you shift from just taking a web page screenshot to creating a purpose-built asset. Think a mobile view for a report, a full-page PDF for your archives, or a perfectly cropped image of a user's profile card for a social media preview.
Fine-Tuning The Viewport and Output
The first layer of customization is usually defining the "camera"—the viewport. By default, an API might render at a standard desktop size like 1920x1080, but that’s rarely what you need for every use case.
For instance, when running visual regression tests, you have to simulate different device screens. You can specify a precise viewport to emulate an iPhone 14 Pro (393x852) or a standard tablet view (768x1024). This is how you ensure your layout doesn't completely break on popular devices.
vwandvh: Sets the viewport width and height of the headless browser's screen. Super useful for testing responsive designs.type: Controls the output file type. Whilepngis great for sharp UI elements,jpegis often better for photos where you need to keep file sizes down. For documents, use the PDF method instead.quality: When using JPEG, you can set a quality level from 1 to 100 to balance image clarity with file size.
Here's a quick look at how you might capture a JPEG screenshot of a mobile viewport using the Node.js SDK.
const screenshot = await capture.fetchImage('https://example.com/product-page', {
  vw: 393,
  vh: 852,
  type: 'jpeg',
  quality: 85
});
This simple call tells the API to render the page as if on a mobile device and save it as a compressed JPEG—perfect for a performance report that isn't bogged down with huge files.
Capturing Full Pages and Specific Elements
Sometimes, what's visible on the screen—the "above the fold" content—isn't enough. You need the whole picture, from header to footer. This is where the full option becomes a lifesaver.
Setting full: true tells the browser to automatically scroll and stitch together the entire length of the page into a single, seamless image. It’s a game-changer for archiving articles, saving terms of service for compliance, or getting a complete overview of a competitor's landing page. This is such a critical feature that the full-screen website screenshot software market is projected to hit $1.36 billion by 2025. This growth shows how much businesses rely on these tools for thorough documentation. You can dig into this market and its impact on enterprise workflows for more details.
But what if you need the opposite? Not the whole page, but just one piece of it. That’s where CSS selectors come in.
By providing a selector in your request, you can target a specific HTML element. The API will render the full page but then automatically crop the final image to the bounding box of that element.
This is incredibly powerful for generating dynamic social media assets. You can design a specific
<div>with anidlike#social-preview-card, populate it with a title and image, and then have the API capture just that element. The result? A perfectly sized Open Graph image every time.
Imagine you want to capture just the main headline from a news article, which has an ID of #main-headline. The code would be dead simple:
const headline = await capture.fetchImage('https://example.com/news/latest-story', {
  selector: '#main-headline'
});
This returns a clean image of just the headline, ready to be dropped anywhere without any manual cropping.
Key SDK Parameters for Screenshot Customization
To tie it all together, here's a quick reference table for the most common parameters you'll use. Think of it as your cheat sheet.
| Parameter | Description | Example Values |
|---|---|---|
type | Specifies the output image format. | 'png', 'jpeg', 'webp' |
quality | Sets JPEG quality (1-100). Ignored for PNG. | 80, 95 |
vw / vh | Viewport width and height in pixels. | vw: 1280, vh: 720 |
full | Captures the entire scrollable page if true. | true, false |
selector | A CSS selector to crop the screenshot to. | '#pricing-table', '.user-avatar' |
scaleFactor | Sets the device pixel ratio for high-res screens. | 1, 2 (for Retina) |
Mastering these options is the key to automating visual content creation. By combining them, you can build sophisticated workflows that produce exactly the right visual for any situation—all without manual intervention.
Capturing Dynamic and Complex Pages
Let's face it, the modern web is a chaotic mess of JavaScript. Pages don't just load; they animate, lazy-load content as you scroll, and throw up cookie banners. A basic, instant web page screenshot often captures a half-rendered mess, making it useless for serious work like visual testing or content archiving.
To get a capture that truly reflects what a user sees, you have to tell the headless browser to wait, watch, and even interact with the page. You need to give things a moment to settle. This is where we move from simple snapshots to professional-grade rendering.
Handling Interactive Elements and Delays
Timing is the most common reason captures fail. Your script is almost always faster than the page's own loading pipeline. The result? Screenshots with missing images, default fonts, and a layout that's still shifting around.
The trick is to build some patience into your process. Instead of firing off a request and hoping for the best, you can use intelligent waits and actions to ensure the page is actually ready.
-
Fixed Delays: Sometimes, the simplest solution is the best. If you know a site has a 1-second entry animation, just add a
delay: 1parameter to your API call. This tells the browser to wait a full second after the initial load before snapping the picture. It's a blunt instrument, but it often works. -
Waiting for Specific Elements: A smarter approach is to wait for specific elements to appear on the page. Modern pages fire off dozens of requests for scripts, images, and pixels. By telling the renderer to wait for a specific selector to appear (e.g.,
waitFor: '.content-loaded'), you ensure all important assets have been fetched before the capture. -
Dismissing Overlays: Nothing ruins a perfect screenshot like a giant cookie banner. A good API lets you run a snippet of JavaScript right before the screenshot is taken. You can use this to programmatically click "accept" or "close."
For instance, to ditch a cookie banner with a button ID of #accept-cookies, you could inject this simple script:
document.querySelector('#accept-cookies')?.click();
This little bit of code runs inside the headless browser, clearing the view for a clean, unobstructed screenshot.
Ensuring Accurate Rendering of Fonts and Media
Getting the timing right is half the battle. The other half is making sure complex visual elements—like custom fonts or WebGL animations—render correctly. Headless environments can be picky.
A common headache is font rendering. Capture a page too quickly, and you'll get fallback system fonts instead of the custom web fonts the designer intended. This can break a layout and trigger false positives in visual regression tests. Using the delay parameter or waiting for a specific element with waitFor is usually the best fix, as it gives font files time to download.
When you're debugging rendering issues, think like the browser. Has the resource loaded? Has the JavaScript that places it on the page executed? A screenshot is just a snapshot in time—your job is to capture the right moment.
Rich media requires similar care.
-
WebGL and Canvas: For pages with 3D graphics or complex
<canvas>visualizations, you have to make sure the headless browser has GPU acceleration enabled. Without it, these elements might not render at all. A quality screenshot API will handle this for you. -
Video Elements: Capturing a
<video>element usually just gives you a black box. To grab a specific frame, you may need to inject a script that seeks to a certain timestamp before triggering the capture.
For those building their own automation, understanding the underlying tools is key. Our guide on capturing screenshots with Puppeteer in Node.js provides a solid foundation for tackling these dynamic rendering challenges from scratch.
By mastering these techniques—waiting for the right moment, interacting with the page, and ensuring all assets are loaded—you can reliably capture even the most complex, JavaScript-heavy single-page applications (SPAs) and get a pixel-perfect result every time.
Building Real-World Automated Workflows
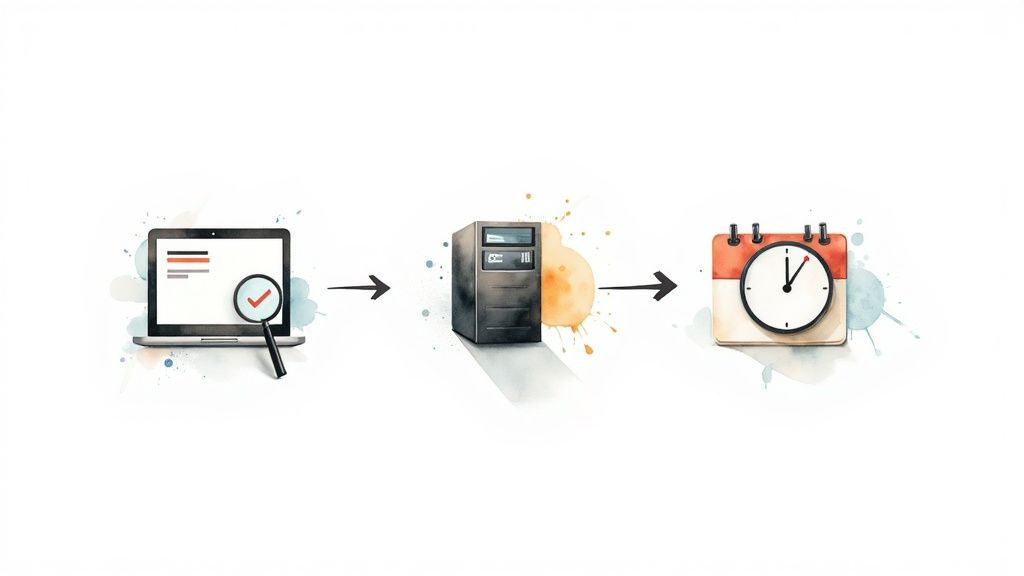
Okay, time for the fun part—connecting the dots. A powerful API is great, but its real value shines when you plug it into a larger, automated process. Let's move beyond single API calls and look at some practical workflows that solve actual business problems.
The goal here is to see how an automated web page screenshot service can become a core piece of your operational toolkit, saving you tons of time while improving your work.
Set Up a Visual Regression Testing Pipeline
One of the best uses for automated screenshots is catching sneaky UI bugs before users do. A visual regression testing pipeline automates this process, giving you a safety net for every code deployment.
The workflow is simple but effective. After every commit to your staging branch, a CI/CD job (like GitHub Actions) triggers the Capture API. It snaps screenshots of key pages on your staging site and compares them against baseline images from production. If the pixel difference between the two versions exceeds a set threshold—say, 1%—the build fails, and your team gets an alert.
This immediately flags visual regressions like broken CSS or overlapping elements that unit and integration tests would completely miss. It’s an essential layer of QA for any front-end team.
Generate Dynamic Social Media Previews
You know those slick, custom preview images that pop up when you share a link on X or LinkedIn? They’re often generated on the fly, and you can build this exact workflow yourself.
The process involves creating a dedicated, unlisted HTML template on your site. Think of it as a mini-webpage designed to look like a social card, which you fill with dynamic data using URL parameters.
Here’s the breakdown:
- Create a Template: Design a URL like
/generate-card?title=My-Blog-Post&author=Jane-Doe. - Populate with JavaScript: The page uses a bit of JavaScript to grab the parameters and inject the title and author name into the HTML.
- Capture the Element: When a new blog post is published, your backend calls the Capture API, points it to this URL, and uses the
selectoroption to screenshot just the social carddiv. - Set the Open Graph Tag: The resulting image URL is then set as the
og:imagemeta tag for the actual blog post.
This entire process is automated. You get custom, on-brand social previews for every piece of content without ever opening an image editor. It’s a huge time-saver that makes your content look way more professional.
Schedule Daily Website Archiving
For industries like finance or legal, keeping a historical record of your website isn't just a good idea—it's often a compliance requirement. Automated screenshots offer a simple, reliable way to create a daily visual archive.
You can set up a simple cron job that runs once a day. This job loops through a list of critical URLs (homepage, terms of service, pricing page) and calls the API to capture a full-page, high-resolution PDF of each one.
These PDFs, complete with timestamps, are then uploaded to secure cloud storage like Amazon S3 or Google Cloud Storage. This creates an auditable, chronological record of exactly what your site looked like on any given day, which can be invaluable for legal disputes or internal audits.
This workflow is also fantastic for competitive analysis. By archiving your competitors’ sites daily, you can track their pricing changes, messaging updates, and new feature launches. The demand for these capabilities has driven significant market growth; full-screen website screenshot software generated around $0.15 billion in 2023 and is expected to double by 2033, largely thanks to the rise in remote work and digital collaboration.
Extend Workflows with OCR and Integrations
The raw image is often just the beginning. For more advanced use cases, you can pipe the screenshot into other services. For example, you could send a captured image to an Optical Character Recognition (OCR) service to extract all the visible text—perfect for monitoring brand mentions or pulling data from sites that don't have an API.
No-code platforms make these integrations even easier. You can connect the Capture API to other apps using tools like Zapier or n8n. If you want to build powerful visual automation without writing a bunch of code, check out our guide on the https://capture.page/n8n-integration.
When you're creating content at scale, like with WordPress mass page generators, having an automated way to verify the output is a must. These workflows prove that a screenshot API is more than just a camera—it’s a versatile building block for creating smarter, more efficient systems.
Frequently Asked Questions
When you start automating screenshots, you'll inevitably hit a few common roadblocks. Don't worry, we've seen them all. Here are some quick answers to the questions that pop up most often.
How Do I Handle Websites That Require a Login?
This one's a classic. The best way to tackle authentication is by passing session cookies or authorization headers with your API request.
The cleanest workflow is to log in through a separate process first. Once you're in, grab the session cookie the site gives you. Then, just include that cookie in the headers of your API call. This makes the headless browser look like a logged-in user, giving you access to protected pages without ever sending raw credentials.
Why Are Fonts or Images Missing from My Screenshot?
Ah, the phantom assets problem. This is almost always a timing issue. The screenshot was taken a split-second before the page's custom fonts or lazy-loaded images had a chance to fully render.
Luckily, the fix is usually straightforward: just add a delay.
A good API gives you a couple of ways to do this:
- A fixed
delayparameter (e.g., tell it to wait 2 seconds). - A
waitForoption that pauses the capture until a specific element appears on the page.
For tricky content that only appears when you scroll, you might need to inject a tiny bit of JavaScript to scroll a specific element into view before the capture fires.
The golden rule for capturing dynamic content is simple: give the page a moment to settle. Rushing the capture is the number one cause of rendering errors. A smart delay or waiting for specific elements to load solves this problem 90% of the time.
Can I Capture a Screenshot from a Specific Country?
Absolutely. This is typically done by routing your request through a proxy server in the region you want.
Many screenshot APIs have built-in proxy support, so you can just specify a country code in your request. The headless browser's traffic is then sent from an IP address in that country. This is super useful for testing localized content, checking regional pricing, or making sure language-specific layouts look right.
What Is the Difference Between an API and Self-Hosting Puppeteer?
This really comes down to a build-versus-buy decision.
Going the self-hosted route with a library like Puppeteer or Playwright gives you complete control, which is great. But it also means you're on the hook for everything else—managing servers, dealing with browser updates and security patches, and figuring out how to scale when you need to run hundreds of captures at once. It's a lot of work.
A managed API takes all that operational headache off your plate. You get a reliable, scalable service that's already been optimized for performance. It almost always saves you a ton of development time and ongoing maintenance costs, letting you get the job done faster.
Ready to automate your visual workflows? With Capture, you can generate high-fidelity screenshots, PDFs, and GIFs with a simple API call. Get started with 100 free credits and see how easy it is to build reliable browser automation. Get started with Capture.
